Hi there! Welcome to Day 1 of the MFT June Teasers! The new products will be available on Tuesday, June 11th at 10 PM Eastern in the MFT Boutique. I have LOTS to share, so I hope you sit down and enjoy :)
This month, MFT is introducing several new fun products in the MIX-ables line ~ Sheer Shimmer Mist and Steel Shimmer Mist which work amazingly well with MFT Premium Dye Inks and MIX-ables Stencils.
Today I have a variety of projects to share including three tags featuring my own custom mixed mist made using Sheer Shimmer Mist and Steel Shimmer Mist along with various MFT inks.
***Please be sure to visit the MFT Blog ~ click HERE ~ to watch a video tutorial that I made showing exactly how easy it is to make your own customized mists using these new awesome products!
I'm really excited to introduce you to several of my stamps, dies and stencil designs that are included in this month's release!
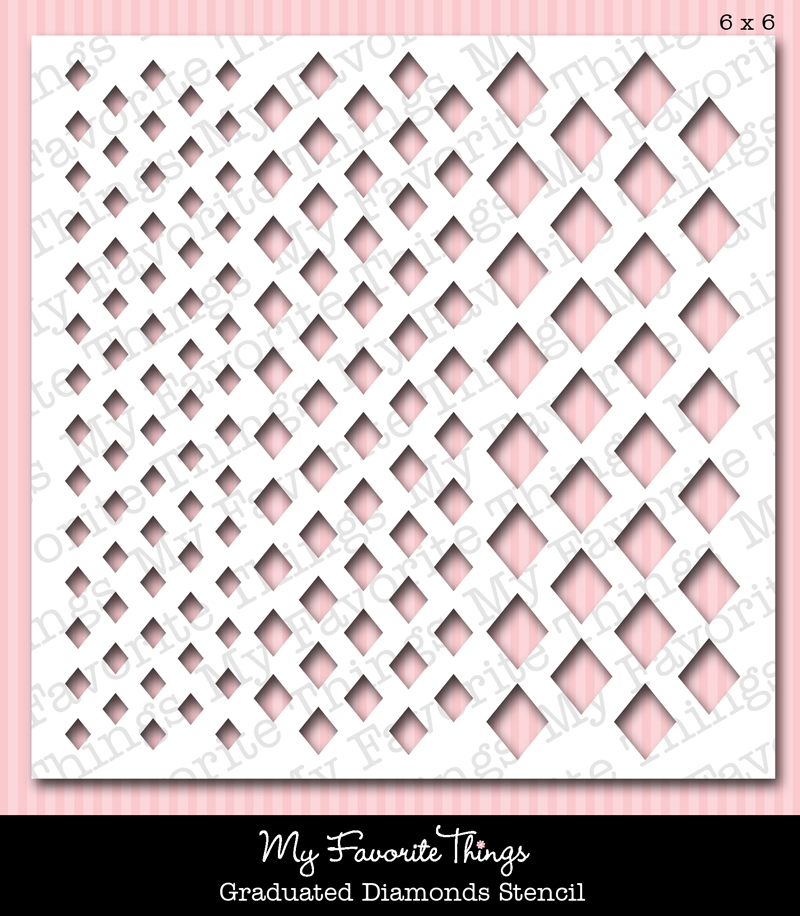
Two of the four stencils I am introducing this month are: the Graduated Diamonds Stencil:
and the Graduated Hexagons Stencil:
First up are an assortment of three tags I made featured in the video tutorial that you able to watch here on the: MFT Blog ~ click HERE. All of the tags were made in a similar manner so the description may sound a bit repetitious. On the tag shown below, the background was sprayed with a mixture of Berrylicious ink and Steel Shimmer Mist for a desaturated shimmery shade of mist. Once dry, I added lots of texture using the Graduated Diamonds Stencil and fiber paste:
The rolled rose was made using Die-namics Large Royal Rose die then sprayed with a mixture of Berrylicious ink and Sheer Shimmer Mist to create a gorgeous pearl shimmery finish. All sentiments on the tags were stamped using LJD Blissful Butterflies stamp set:
On the next tag, the background was sprayed using a combination of Wild Cherry ink and Steel Shimmer Mist for a desaturated shimmery shade of mist. Once dry, I added lots of texture using the Graduated Hexagons Stencil and fiber paste:
The blossom was made using Die-namics Large Hybrid Heirloom Rose then sprayed with a mixture of Wild Cherry ink and Sheer Shimmer Mist to create a gorgeous pearl shimmery finish:
The last tag was sprayed using a combination of Razzle Berry ink and Steel Shimmer Mist for a desaturated shimmery shade of mist. Once dry, I added lots of texture using the Graduated Diamonds Stencil and fiber paste:
I am also introducing the following products:
Blooming Roses stamp set which is full of beautiful blossoms:
Die-namics Rose Bouquet which coordinates flawlessly with Blooming Roses:
and the Rose Builder Stencil which is perfect for adding dimension and design to any of your projects:
I made an 8" x 8" chipboard album for April featuring lots of photos that were taken after her graduation commencement ceremony last month. This book is overflowing with Blooming Roses, butterflies and texture! Once I painted and added the crackle texture to the entire book, the fun began!!! All the pages contain stenciled roses that were made using the Rose Builder Stencil and misted backgrounds using my own custom mists as explained above and in the video along with the Graduated Diamonds Stencil.
The cover features the following: a cluster of rose blossoms and leaves made using Blooming Roses that were die cut using Die-namics Rose Bouquet, stenciled roses made using the Rose Builder Stencil, a sentiment from Chalkboard Greetings, a pretty butterfly from LJD Blissful Butterflies:
To make the two big pink stamped blossoms, I used the larger solid rose image from Blooming Roses along with Pink Lemonade ink then stamped the highlights using Bubblegum ink. After stamping the blossom, I topped them with a coat of Sheer Sparkle Glitter Glaze. Notice the shimmery 3D rose in the lower left corner? To create that one, I used Die-namics Mini Royal Roses. Once the flower was made, I sprayed using custom mist that was made using Pink Lemonade ink and Sheer Shimmer Mist.
Here's a close up of the larger stenciled rose and leaf that was made using the Rose Builder Stencil.
Since this book is ALL about April, I thought it was appropriate to start the book off with a photo of April which clearly shows her great sense of accomplishment and perseverance! The sentiment is one of the many fun and versatile sentiments from Bold Statements and the sweet butterflies fluttering about are from LJD Blissful Butterflies.
Two single roses from Blooming Roses:
Page 2 features a photo of April and my sweet loving son Jerry :) along with a Razzle Berry stamped butterfly from LJD Blissful Butterflies and another great sentiment from Chalkboard Greetings:
More Sheer Sparkle Glitter Glaze covered rose blossoms made using images from Blooming Roses:
Page 2 features a photo of April and her dear Mom along with several rose blossoms from Blooming Roses, a sweet butterfly from LJD Blissful Butterflies and another great sentiment from Bold Statements:
Page 3 features a photo of April and her dear Dad along with several rose blossoms from Blooming Roses, a sweet butterfly from LJD Blissful Butterflies and another great sentiment from Chalkboard Greetings:
The 3D rose was sprayed using custom mixed mist made using Razzle Berry ink and Sheer Shimmer Mist. I just love the shimmery finish!
Each page, opposite of the photos were all sprayed with inks and various roses were stenciled on using the Rose Builder Stencil. I didn't share everyone of them because I didn't want to bore you to tears so I just shared a random few. I just love the way the trio of rose buds look together:
Page 4 features a photo of April and her dear sister along with several rose blossoms from Blooming Roses, a sweet butterfly from LJD Blissful Butterflies and another great sentiment from Chalkboard Greetings:
Last but not least features a photo of April and her future in-Laws :) More rose blossoms from Blooming Roses, a sweet butterfly from LJD Blissful Butterflies and another great sentiment from Bold Statements:
Thank you so much for stopping by today! I hope you enjoyed all my projects!
Be sure to stop by the MFT Blog to see what the rest of the team has created. You'll also read about some HUGE prizes being given away this week during Teaser Time that you won't want to miss!
I'll be back tomorrow with more to share for Day 2!
Be Sweet ;)

Read More


 Die-namics Rose Bouquet which coordinates flawlessly with Blooming Roses:


 On top of the layered patterned paper, I added a rock wall using the Rock Wall stencil and fiber paste. Once the fiber paste was dry, I added color using MFT Steel Shimmer Mist and a purple mist from my stash. Notice the neat pieces of Washi tape at the top of the page? These were made using Washi Patterns and Die-namics Washi Tape.
 I added a cluster of glittery coated Grapesicle stamped rose blossoms that were made using stamps from Blooming Roses and die cut using Die-namics Rose Bouquet.

 Of course I had to add a beautiful Kraft stamped butterfly from LJD Blissful Butterflies that was stamped on a coordinating die cut made using a Die-namics LJD Blissful Butterflies die. I topped it off with a beautiful Grapesicle button.
 Thank you so much for visiting today ~ I hope you enjoyed my layout as much as I enjoyed creating it :)
 Please be sure to stop by the MFT Blog for loads of inspiration from the team. You'll also read about some HUGE prizes being given away this week during Teaser Time that you won't want to miss!






 Posts