Showing posts with label Tutorial. Show all posts

REMEMBER and a tutorial 13

Mona Pendleton | Monday, March 7, 2016 @ 5:15 PM | , , , , ,

Hi there! Today it's my turn to share a project on the Prima blog featuring Finnabair art basics Mixed Media Essentials Kit.
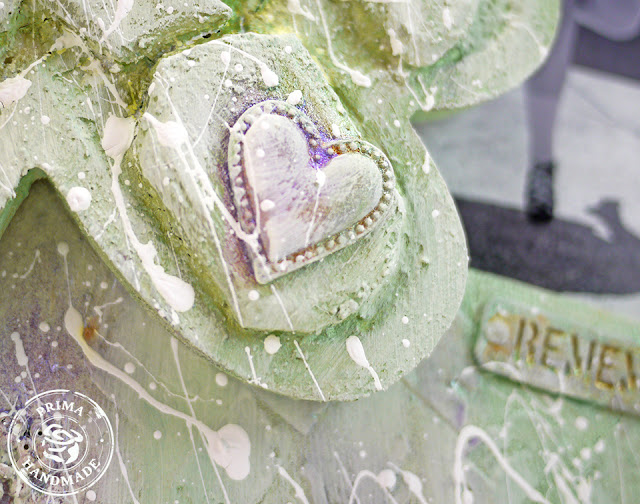
In celebration of St. Patrick’s Day, I was inspired to alter a picture frame Finnabair style. I featured a photo of my sweet daughter in law and her Mom celebrating their Irish heritage while performing a traditional Irish dance. I created a mosaic like shamrock using fun geo shapes, various Finnabair mediums from the Mixed Media Essentials Kit and mica powders.


In case you were curious about how I made this project, I took several step shots along the way sharing my creative process:
Step 1: Apply white gesso to all geo shapes, metal embellishments, shamrock and photo frame. 
Step 2: Apply white sand texture paste around geo shapes.
Step 3: Randomly apply texture and design to photo frame using stencil and modeling paste.
Step 4: Randomly adhere glass beads to photo frame using gel paste.
Step 5: Mix mica powders with water, randomly apply to photo frame and shamrock until desired look is achieved. 
Step 6: Adhere shamrock to photo frame, highlight areas using white gesso then randomly splatter with white acrylic paint.
Thanks so much for stopping by! I hope you enjoyed my projects. Please be sure to visit the Prima blog for loads of awesome inspiration!
Be Sweet ;)

Prima products used: 584542-Geo Shapes Ombre Crush, 963002-Finnabair art Extravagance Texture Paste White Sand, 962951-Finnabair art Extravagance Heavy Gesso White, 962982-Finnabair art basics 3D Gloss Gel Transparent, 962975-Finnabair art basics Modeling Paste Opaque Matte, 961398-Finnabair art basics 3D Matte Gel Transparent, 961671-Finnabair art ingredients Glass Beads Crystal, 962500-Finnabair art ingredients Mica Powder Green, 962524-Finnabair art ingredients Mica Powder Gold, 962479-Finnabair art ingredients Mica Powder Purple, 963361-Finnabair Mechanicals Metal Embellishments Tin Hearts, 572167-12 x 12 Stencil Mask Rattan, 960322-Finnabair Vintage Trinkets, Mini Flowers, 892210-Ingvild Bolme Jean Plates
Read More

Valentine's Day tags and a tutorial 23

Mona Pendleton | Wednesday, February 3, 2016 @ 9:41 AM | , , , , , ,

Hi! Love is in the air! Today it's my turn to share a few projects on the Prima blog. Please feel free to stop by and say hi HERE :) We were asked to create tags using a red, pink and white color palette along with adhesive rub ons and or foils.
 created a couple mixed media tags just in time for Valentine’s Day featuring both:
I created a Valentine’s Day tag featuring an oil pastel water colored die cut heart which showcases a rub on I love you sentiment covered with gold foil. I stamped pretty flowers using oil pastels and embossing powder then layered with the foil sentiment along with a variety of stamped flowers, flower embellishments and a resin cupid.


The second tag is a bit more on the shabby side:
I combined pretty papers from the beautiful Salvage District along with a variety of beautiful blossoms and Micro Bead covered die cut hearts. For a splash of pink, I randomly splattered shimmery Metallique Vintage Rose acrylic paint to the background:

Here are a few steps I took along the way:
Step 1:
Die cut heart using watercolor paper using metal die. Trim adhesive rub on “I love you” sentiment from carrier sheet, apply to die cut heart then apply gold foil. Color with Red Oil Pastel then apply water using a paintbrush to “move” the pigment around. Dry and set aside.

Step 2:
Die cut watercolor paper using metal die. Apply Red Oil Pastel to solid part of floral stamp, lightly mist with water, stamp. Repeat process randomly until desired look is achieved. Stamp and emboss leaves.

Step 3:
Using a stamp from the IOD stamp set, stamp on a piece of watercolor paper, trim and distress around edges.

Step 4.
Assemble tag and embellish as desired. Enjoy :)

February's Prima Product Pick challenge combines the sweetest colors of soft pink, rich red, pure white (and a few shades in between) with dazzling products for an inspiring, love-filled board. Why not gather your Prima goodies and join in the fun?!
Thanks so much for stopping by! I hope you enjoyed my projects. Please be sure to visit the Prima blog for loads of awesome inspiration!
Be Sweet ;)
Prima Product list for first tag: 585624-Prima Rub-On Foils-Intergalactic, 971397-Christine Adolph Adhesive Rub-Ons, 583729-Salvage District A4 Collection Kit, 980269-Jamie Dougherty-A4 Watercolor Paper Pad, 814687-Iron Orchid Decor-Cling Stamps, 566784-Prima flowers-Cabriole White, 580742-Debutante Collection-Lucca, 580605-Jodie Lee Butterfly Collection-Bulbe, 573478-Resin Angels, 814328-Iron Orchid Decor Water Soluble Oil Pastels-Red, 584061-Prima Dies-Filigree Lace, 890995-Ingvild Bolme Chalk Edger-Black Coal

Prima Product list for second tag: 971311-Christine Adolph-Adhesive RubOns, 585617-Prima Rub-On Foils-Holographic Dreams, 963200-Finnabair art alchemy Acrylic Paint Metallique Vintage Rose, 962593-Finnabair art ingredients Micro Beads Blush, 962975-Finnabair art basics Modeling Paste Opaque Matte, 962982-Finnabair art basics 3D Gloss Gel Tranparent, 962951-Finnabair art basics Heavy Gesso White, 847524-12x12 Salvage District-Palais Royal, 847531-12x12 Salvage District-Palace Garden, 573475-Resin Angels 1, 891046-Ingvild Bolme Chalk Edger Rose Bud, 584979-Chipboard Tags Large, 565855-Prima Flowers Labelle Island Mix, 580605- Jodie Lee Butterfly Collection-Bulbe, 586683- Prima flowers, 579890-6x6 Stencil-Fluttering Flowers, 572105-Wire Thread Ivory, 584054-Prima Dies-Crochet Doily
Read More

love...a ColourArte Tutorial 17

Mona Pendleton | Wednesday, July 15, 2015 @ 9:00 PM | , , , , , , ,

Hi there! I hope you are having a great week! It's my turn to share a project along with a step by step tutorial on the ColourArte blog today. I would be delighted if you were to stop by and check out my project here: ColourArte blog.
Here's a sneak peek:

Please feel free to take a moment to visit the ColourArte blog and absorb all the amazing DT inspiration! Thanks so much for stopping by!
Be Sweet ;)

P.S.~ Mark you calendars!
post signature
Read More

with love 55

Mona Pendleton | Thursday, July 9, 2015 @ 10:00 AM | , , , , ,


Hi there! I'm so excited because our summer vacation is right around the corner. I really would have liked to revisit Paris but Scott opted for more of a relaxing vacation so instead we will be heading to lounge around on the Maui shores which is COMPLETELY fine with me :)
With Paris on my mind, I created a card featuring the beautiful Eiffel Tower:
I joined along again with the Compendium of Curiosities challenge, creating another Frosted Film tattered floral as well as the A Vintage Journey challenge ~ where the theme is Destinations. This is the smaller version and if you missed my card yesterday, you can see what my bigger Frosted Film Tattered Floral looks like by clicking HERE:
I gave the die cut Grungeboard Eiffel Tower a generous coat of Crackle Texture Paste:
Amongst all the layers and crackle, is a metal bird embellishment which I altered using Gesso and Distress Ink:
Here are a few steps I took along the way sharing my creative process:
Use Texture Paste along with stencil (****done prior to applying Distress Inks!***)
Randomly apply Distress Inks of choice:


 The ink I used to add color to the flower is even French! :) LOL
I'm also joining along with the following challenges: For sketch inspiration ~ Cardabilities and Try it on Tuesday where the theme is In the Frame.

Here are a few photos taken while on our Paris trip in 2011. If you have visited, I'm pretty sure you will agree that this city is quite breathtaking. There is so much to see and do and that is exactly why Scott didn't want to go. He didn't want to have to take a vacation when we returned home to recover from our vacation :)

Scott took the following photos from the observation deck on the Eiffel Tower:

 Silly me :)

Thanks so much for visiting! I hope you have enjoyed my project and photos.
Be Sweet ;)
post signature


Read More

be still...A ColourArte Tutorial 24

Mona Pendleton | Wednesday, July 1, 2015 @ 11:00 PM | , , , ,

Hi there! I hope you are having a great week! It's my turn to share a project along with a step by step tutorial on the ColourArte blog today. I would be delighted if you were to stop by and check out my project here: ColourArte blog.
Here's a sneak peek:

Please feel free to take a moment to visit the ColourArte blog and absorb all the amazing DT inspiration!

I also have some exciting news to share ~ today, I am sharing a project as a Guest Designer on the fabulous Frilly and Funkie Challenge Blog:
This current challenge theme is all about: "Something to say..."- there are so many fabulous quotes and sayings now available for use on our projects. Whether you stamp it, print it, write it or die cut it, make your sentiment the main focus of attention on your vintage or shabby chic entries. 
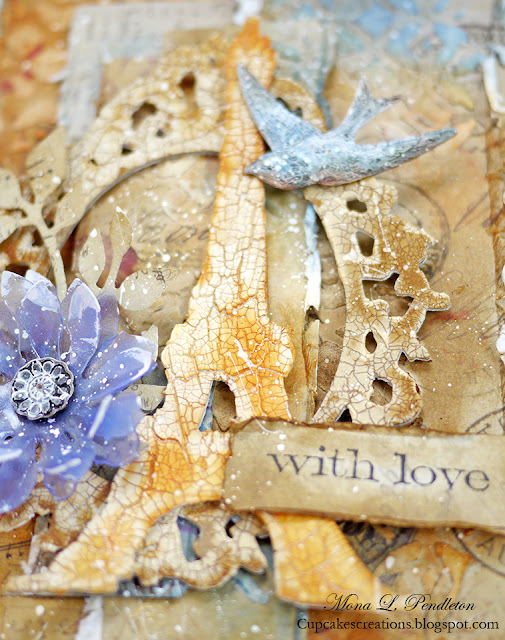
While focusing on the challenge theme "Something to say", I was inspired to create a shabby mixed media card featuring a die cut sentiment ~ the powerful one word ~ believe. 
The world can be quite a chaotic place and it's so easy to get caught up in all the mayhem. Reminding a loved one or a complete stranger to believe may provide the small dose of hope and encouragement they need.
I started with plain watercolor paper which I transformed using a stencil, modeling paste, ColourArte Silks Acrylic Glaze: Sunburst and Silver Bells, stamps and embossing powder. I embellished with a beautiful chipboard heart from Gina's Designs which I covered with a crackle paste and an application of ColourArte Silks Acrylic Glaze: Silver Bells. I completed the card with a variety of Prima flowers and a Prima resin cherub:
For color inspiration, I joined along with the current Card Concept challenge:
For sketch inspiration, I joined along with this week's MOJO Monday sketch challenge:
Thanks so much for stopping by! I hope you enjoy my sample for the "Something to say" challenge and I look forward to seeing what you create! Many thanks to Linda, Sue and the wildly creative DT for inviting me to share my creativity on the fabulous Frilly and Funkie Challenge Blog today. I'm very honored and grateful for the wonderful opportunity. Please be sure to visit the Frilly and Funkie Challenge Blog (click HERE) to see all the beautiful DT samples!
Be Sweet ;)
post signature
Read More


Cupcake's Creations Copyright © 2010 Prozine - Designed by Lasantha customized by Scott Pendleton for Mona
Banner graphic elements courtesy: House of Three
Home | RSS Feed | Comment RSS